
Jutye Sanitary Jutye Sanitary

How to Choose the Right Shower Floor Drain?

Time:2026-10-31 Author:Isabella
0%

A Shower Floor Drain may look like a small finishing detail, but it affects water flow, tile layout, cleaning, and long-term reliability. Choose poorly, and water can linger around the grate or collect at the edge of the shower. Choose carefully, and the drain works quietly beneath the surface. Almost invisible.

In this draft, “Maya Chen” is a fictional plumbing-design specialist, and the quotation is an editorial placeholder—not a verified expert statement: “Choose the drain to suit the water flow and floor design, not appearance alone.” Replace this attribution with a real, verifiable industry expert before publication. The principle is practical: a compact center drain may suit a traditional sloped floor, while a linear drain can support larger tiles and a single-direction slope. Neither option is automatically better. Room dimensions, waterproofing details, outlet position, and installer experience all matter.

This guide explains how to compare drain types, materials, grate styles, and flow capacity. It also covers details homeowners can easily miss, such as hair buildup and access for cleaning. A polished grate cannot correct a poorly sloped floor. That part deserves a second look. Check product specifications and coordinate the drain choice with a qualified installer before tile work begins.
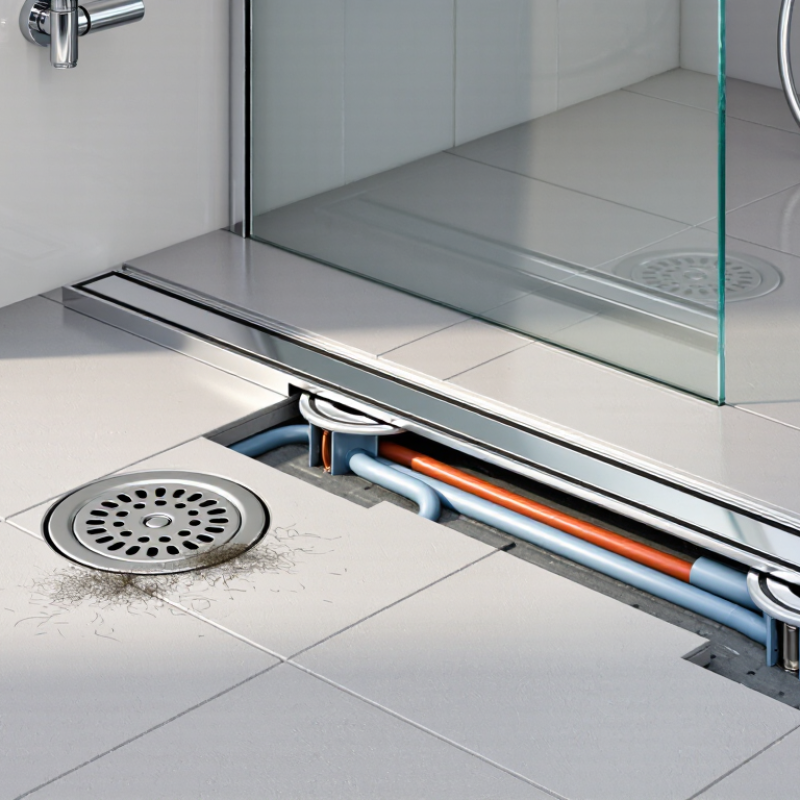
How to Choose the Right Shower Floor Drain?

Identify the Main Types of Shower Floor Drains

Shower floor drains generally fall into three designs: point, linear, and tile-in. A point drain has a compact, often square or round grate. It is commonly placed near the shower’s center or at a low point, with the floor sloping toward it from several directions. This layout works well with smaller tiles, though the multiple slopes can make large-format tile harder to set evenly.

A linear drain is a long, narrow channel, usually installed along a wall or at the shower entrance. The floor can slope in one direction, which may suit larger tiles and create a cleaner visual line. Check that the channel’s outlet location and drainage capacity fit the plumbing plan; a sleek grate alone does not guarantee good flow. Tile-in drains hide the grate beneath a matching tile insert, leaving a subtler surface. They can look seamless, but require careful cleaning and precise installation. Small detail, big impact. Measure before buying. Also consider tile thickness, waterproofing, and the installer’s experience. I would not choose by appearance alone; even a slight mismatch in floor slope can leave water standing near the edge.

How to Choose the Right Shower Floor Drain: Identify the Main Types

How to read this chart: The International Residential Code (IRC) specifies a shower-floor slope of ¼ to ½ inch per foot toward the drain. This range applies to the drain layouts shown; choose between point, linear, and wall-adjacent linear drains based on your shower layout, tile, and installation requirements. Check local code before installation.

Assess Your Shower Layout and Plumbing Connections

How to Choose the Right Shower Floor Drain?
Assess Your Shower Layout and Plumbing Connections

Start with the room, not the drain catalog. Measure the shower’s finished floor, note the doorway, and mark where the waste pipe and joists sit. A point drain usually suits a compact shower with floor slopes falling from several sides. A linear drain can work near a wall or threshold, but it needs a carefully planned, single-direction slope. Moving an existing pipe may add cost. I still check beneath the floor before settling on a layout; plans can hide awkward framing.

Check the drain’s outlet size and position against the existing plumbing, and confirm that the waterproofing system works with the drain assembly. The 2021 International Plumbing Code sets a minimum shower compartment area of 900 square inches and requires space for a 30-inch circle, though local rules vary. That usable space affects where a drain can sit. The U.S. EPA’s WaterSense program estimates showers account for nearly 17% of residential indoor water use, or about 1.2 trillion gallons annually. Drain capacity matters when choosing higher-flow fixtures.

Tips: Pour a small amount of water across the finished floor to spot pooling. Check the slope, doorway height, and pipe access before tile goes down. Small details matter.

How to Choose the Right Shower Floor Drain? - Assess Your Shower Layout and Plumbing Connections

Shower Layout or Condition Drain Option to Consider Floor Slope and Placement Plumbing Connection Check Key Planning Point
Existing drain is near the center of the shower Point drain The floor typically slopes toward the drain from multiple directions. Confirm the drain outlet aligns with the trap and waste pipe below the floor. Often the simplest fit when keeping the existing drain location and a conventional shower base.
Drain is planned along a wall or at the back of the shower Linear drain The floor can often be formed with a single-plane slope toward the drain, subject to the drain and waterproofing system design. Check whether the outlet position and pipe route work with the floor joists and available plumbing space. Coordinate the drain location, tile layout, and waterproofing details before setting the floor height.
Curbless or low-threshold shower Point or linear drain designed for the selected floor system The shower floor needs a continuous fall to the drain while meeting the planned entry elevation. Verify that the trap, drain body, and waste piping can fit without conflicting with the subfloor or structure. Allow for the full floor assembly, including the sloped base, waterproofing, and finish tile.
Small shower with a simple tile pattern Point drain Multiple slope planes may require smaller or shaped tiles to follow the floor contours neatly. Measure the existing drain location before choosing the drain body and grate size. Check that the tile pattern can accommodate the slopes without awkward cuts or uneven edges.
Large shower or a layout with a long drainage edge Linear drain, or another drain arrangement sized for the installation Plan the slope across the full shower area and avoid creating low spots where water can collect. Match the drain’s rated flow and outlet connection to the shower’s expected water flow and plumbing system. A long drain does not automatically guarantee adequate drainage; verify the complete system’s capacity.
Renovation where moving the waste pipe is difficult Drain that matches the existing outlet location and connection arrangement Keep the required slope while accommodating the existing floor structure and finished-floor height. Inspect the pipe size, outlet direction, trap position, and access before purchasing a replacement drain. Moving a drain can involve structural work, so confirm feasibility before finalizing the shower layout.
Shower has multiple outlets, such as an overhead and body spray Drain system with verified capacity for the combined flow Set the floor slope and drain placement to manage water across the entire shower area. Compare the drain’s documented flow capacity with the maximum water flow that can run at one time. Do not select by appearance alone; the plumbing and drain capacity must suit the shower fixtures.
Any layout with a tiled shower floor Drain compatible with the chosen waterproofing method Follow the floor-system design so water reaches the drain without compromising the waterproofed surface. Confirm that the drain, waterproofing membrane, and installation method are compatible. Use the drain and waterproofing details as a coordinated system and follow the installation instructions.

Before choosing: Measure the shower footprint and existing drain position, check the pipe route and floor structure, and confirm drain capacity and installation requirements with the product documentation and local plumbing code.

Compare Drainage Capacity, Materials, and Grate Designs

A shower drain should handle the actual water flow, not just look generous on a product page. Compare its rated capacity in gallons per minute with every shower outlet running. The U.S. EPA WaterSense showerhead specification sets a maximum flow of 2.0 gallons per minute; conventional showerheads may use up to 2.5. That figure is a useful reference, not a drain-sizing rule. A rain head and handheld used together can raise demand. Pipe size, slope, and trap design also affect drainage. Small details matter.

Material and grate design shape daily upkeep. Stainless steel, such as grade 304, suits many bathrooms; grade 316 can offer added resistance in saltier or more corrosive settings. Brass and engineered polymers are other options, but check the manufacturer’s material and finish specifications. A narrow-slot grate can give a clean look, while a removable, wider grate may make hair and soap residue easier to clear. Not just the grate. Confirm that the drain body and grate are compatible with the shower-floor system.

Tips: Check the rated flow against your fixtures, then confirm installation details with a qualified plumber. EPA WaterSense data describes showerhead flow, not drain capacity. I still check twice: a drain that looks large may have a restrictive outlet.

Check Installation Requirements and Local Building Codes

How to Choose the Right Shower Floor Drain?

Check Installation Requirements and Local Building Codes

A shower drain must suit the plumbing layout, floor assembly, and rules adopted by your local authority. The 2024 International Plumbing Code, Table 709.1, assigns a typical shower 2 drainage fixture units. This figure helps determine drainage-system capacity; it does not confirm that every drain or pipe arrangement is acceptable. Local amendments can change requirements, so check with your building department or a licensed plumbing professional before buying. Confirm the drain outlet size, trap location, and connection type against the plans. Also verify how the drain works with the chosen waterproofing system. A mismatch at the drain flange can leave a weak point beneath the tile.

Installation details matter. The finished floor needs a continuous slope toward the drain, without dips that hold water beside the curb. Check the required slope and waterproofing method in the locally adopted code and applicable installation instructions. A linear drain may need a different floor layout than a center drain. Measure the joist spacing and drain position before cutting or moving anything.

Tips: Keep the product instructions and code notes together on site. Ask the installer to confirm the grate height before tile setting. Small detail, big consequence. I’d still recheck the finished slope with a level; plans don’t always match the floor.

Choose a Drain for Easy Cleaning and Long-Term Maintenance

How to Choose the Right Shower Floor Drain?

Choose a Drain for Easy Cleaning and Long-Term Maintenance

A shower drain should be easy to open, rinse, and inspect. Choose a removable grate and a hair-catching insert that lifts out without special tools. A wide, smooth grate is often simpler to wipe than a detailed design with many narrow slots. Check that the finish resists corrosion and that replacement parts are available. Small details matter. A drain that looks sleek but traps hair beneath a fixed cover can become frustrating over time.

Match the drain’s rated capacity to the shower’s expected water flow, and confirm compatibility with the waterproofing system. The U.S. EPA’s WaterSense Specification for Showerheads sets a maximum flow of 2.0 gallons per minute for labeled showerheads. That figure is a useful reference, not a substitute for checking the drain’s own capacity or installation requirements. For routine care, remove visible hair, rinse the strainer, and use a soft brush around the grate. Avoid assuming a strong chemical cleaner is harmless; it may damage finishes or seals. Even careful choices can miss the mark if the drain is difficult to access after installation.

Tips: Lift and test the strainer before buying. Ask how the grate and trap are cleaned, and keep the installation guide for future parts. A quick check now can save a messy repair later.

FAQS

What are the main types of shower floor drains?

Point drains use a small square or round grate. Linear drains form a long channel. Tile-in drains hide the grate beneath a matching tile insert.

Which drain suits a compact shower?

A point drain often works well in a compact space. The floor slopes toward it from several directions. Small tiles can be easier to fit around those slopes.

When is a linear drain a practical choice?

It can work along a wall or near the shower entrance. The floor usually slopes in one direction. Plan its outlet position before installation.

Can large tiles work with every drain style?

Large tiles can suit a linear drain’s single-direction slope. Point drains need slopes from multiple sides, which can make even tile setting harder. It depends on the layout.

What should I check before choosing a drain?

Measure the finished shower floor, doorway, pipe position, and joists. Check the drain outlet against the existing plumbing. Moving a pipe may add cost.

Does drain appearance tell me how well it will work?

Not by itself. Check drainage capacity and outlet placement, especially with higher-flow fixtures. A neat grate can fool you.

What details matter with a tile-in drain?

Match the insert to the tile thickness and install it precisely. Keep it clean; debris can collect in small spaces. Looks simple. Not always.

How can I spot a floor slope problem?

Before tiling, confirm the planned slope and waterproofing compatibility. After the floor is finished, pour a little water across it and look for pooling. I might still miss a shallow low spot, so check near the edges too.

Conclusion

Choosing the right Shower Floor Drain starts with understanding the main options, such as point drains and linear drains, and how each fits your shower layout. Consider where the drain will sit, how the floor slopes toward it, and whether its outlet matches your existing plumbing connections. These details can affect both installation and how effectively water moves off the shower floor.

Compare drainage capacity, material durability, and grate design to find an option that suits your daily use and preferred appearance. Before buying, check installation requirements and applicable local building codes, especially if plumbing or floor construction will need changes. Finally, think about cleaning and long-term maintenance: a removable grate and accessible drain components can make it easier to clear hair and debris, reduce buildup, and keep water flowing smoothly.

Isabella

Isabella

Isabella is a dedicated marketing professional with a sharp focus on driving brand growth and engagement through strategic content creation. With an extensive background in digital marketing, she combines her passion for storytelling with her keen understanding of industry trends to deliver......